Basic Bobbin Lace: Two-Color Bracelet

Bobbin lace is an off-loom weaving technique that uses a dense pillow, pins, and bobbins to create delicate laces. It was popular in the 17th and 18th centuries, especially in England and Europe.
Using bobbin lace techniques, you can create beautiful bands and appliqués to decorate your handwoven textiles. It's also a great way to use up thrums and odd bits of leftover yarn.
Project Details
This bracelet provides an introduction to bobbin lace, but is interesting enough that even experienced lace makers may find it entertaining. It uses contrasting colors to create a friendship bracelet with a central fan motif.
This project uses eighteen bobbins—which sounds like a lot, until you realize that only four bobbins are in use at any given time. If you don't have bobbin-lace equipment, you can improvise some, as explained below.
Equipment and Yarn
Bobbin Lace Pillow
This is the surface bobbin lace is woven on. It needs to be dense enough to hold pins firmly, even when tension is applied to them during weaving. You can purchase ready-made lace pillows, or create your own by wrapping dense Styrofoam with fabric.
For this project, I recommend a pillow approximately 18 inches high by 15 inches wide, although you could make do with something a bit narrower.
Bobbins
Bobbins store the thread and also provide a handle that you can use to manipulate the threads during weaving. Bobbins are often decorated, which can be an aid in identifying the working threads.
You will need nine pairs of bobbins (18 bobbins total) for this project.
If you don’t have bobbins, you can improvise some by cutting a wooden chopstick down to about four inches long. Wrapping a rubber band around the head will help keep the thread from falling off the end as you manipulate the bobbins.
Pins
The pins used for bobbin lace need to be sturdy as they are pulled on while the cloth is tensioned. They do not need to be overly long. I use ordinary sewing pins, the kind with a small metal head. (Glass beads or other heads on the pins would make it hard to place the pins close enough together in fine laces.)
 Pricking
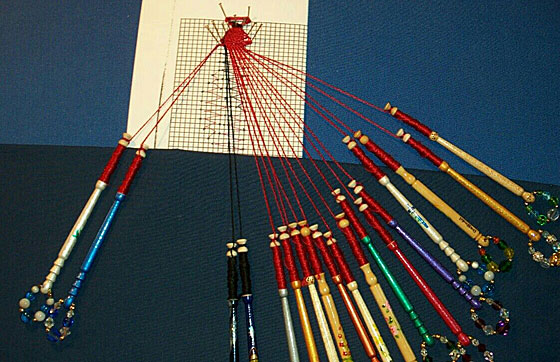
A pricking is the pattern you follow when weaving bobbin lace. Dots on the pattern indicate where the pins should go. You start at the top of the pattern and add pins as you work your way down the pattern, building the ‘loom’ as you weave.
Prickings are drawn on graph paper appropriate to the size of the yarns being used, with larger yarns using grids with fewer lines per inch. For this project I’ve used graph paper with ten squares to the inch. You can use a photocopier to increase or reduce the size of a pattern to match the gauge for your threads.
The three colors in this pricking show the order the three different areas are to be woven: blue first, red second, then green.
Cover Cloth (optional)
This is a piece of cloth you put over the unwoven portion of the pricking to protect the threads from any transfer from the pencil lead or toner as well as from the pins holding the pricking down.
Thread
Fine linen or cotton thread in white or natural colors is traditional for lace, but you can use any thread. You may have to experiment a bit with the grist of yarn and scale of the pricking to find a combination that creates a pleasing lace.
For this project I used 8/2 Tencel in red and black.
Winding the Bobbins
Wind one pair of bobbins with the accent color (black) and eight pairs of bobbins with the main color (red).
In bobbin lace, the thread is typically wound onto the bobbins in pairs. This means that you cut a thread twice as long as the thread you intend to put on each bobbin and wind half of the thread onto the first bobbin, and the other half onto the second. After the thread is wound onto the bobbins, tie a half-hitch around each bobbin to keep the thread from unwinding.
Note: Tying a slip knot in the center of the thread before you begin winding the bobbins helps ensure that each bobbin gets half the thread. After winding, simply pull to release the slip knot.
A general guideline for the amount of thread you need to put on each bobbin is four times the length of the pricking for passive threads and eight times the length for worker bobbins. Since bobbins are wound in pairs you would actually cut threads eight times the length of the pricking for passive pairs (and wind that over two bobbins) and sixteen times the length for worker pairs (wound over two bobbins.)
Weaving the Bracelet
The bracelet in this article was woven using Cloth Stitch (aka plain weave) but other lace stitches can be used to create different variations.
In bobbin lace, each thread can be either a weft or warp thread. Threads acting as weft threads are called workers, and you typically have two worker threads at any given time. Threads acting as warp threads are called passives. Two weft/worker threads interact with two passive/warp threads at a time, meaning that—no matter how many threads/bobbins are in the project—you are always only manipulating four threads at any given time.
As the weaving progresses, the 'loom' is built by inserting the pins into the pricking as each row is completed. Pins should be set into the pillow at an angle, pointing slightly away from the weaving. This helps to keep the tension even on the threads.
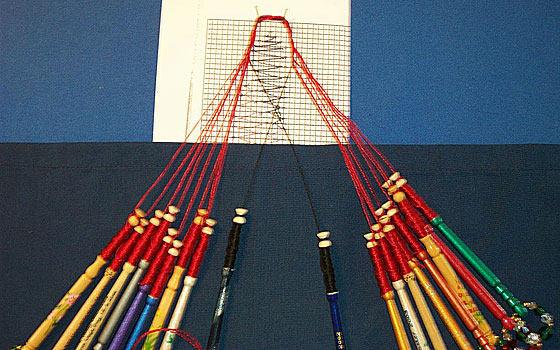
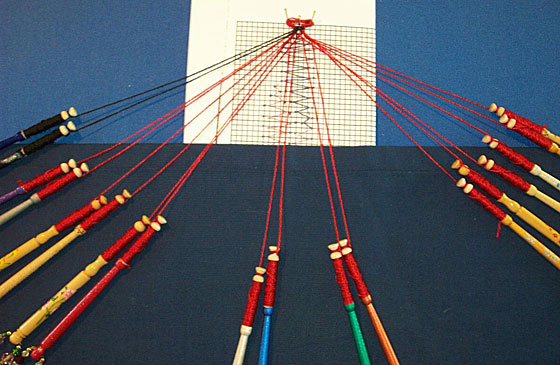
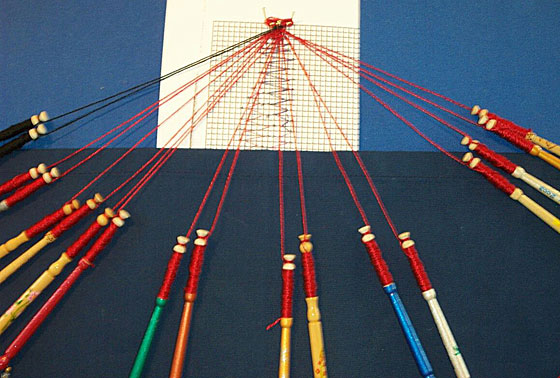
Begin by hanging all 18 bobbins over the two pins at the very top of the pricking.
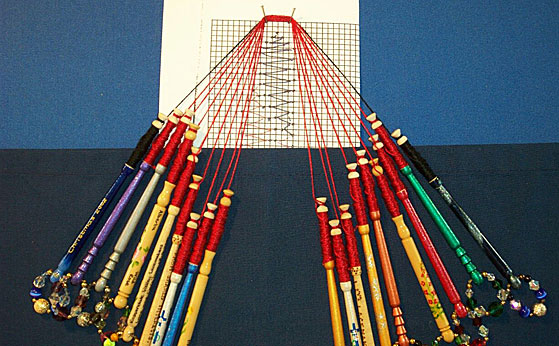
Start with the bobbins on one side of the loop (I chose the left) and divide the nine bobbins into three groups of three.
Using these three groups, make a standard three-strand braid about 1-1/2 to 2 inches long. This creates the loop clasp for the front of the bracelet.
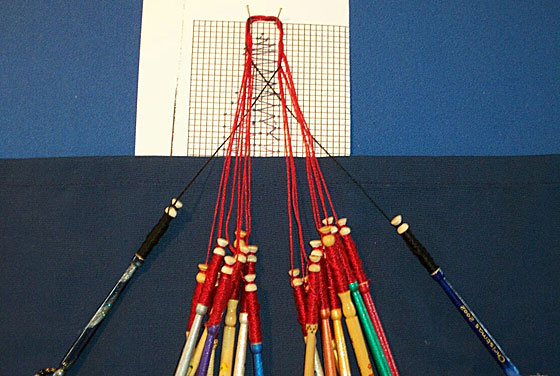
Re-position the bobbins evenly so that the braid is over the two pins. Using the two black threads, bind the two halves together by making a figure eight around the threads. Begin by crossing the two black threads in the middle.
Pass each group of red threads over the black threads.
Bring the black threads over the red ones, back to the center and cross them again.
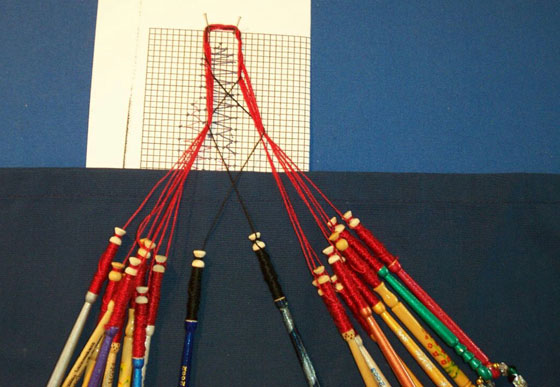
Tie the black threads together securing the two groups of red threads. I find that setting a pin to tie the knot around helps make a secure knot.
Bring the black threads to the left hand side and make the length of the bobbins as close to even as possible.

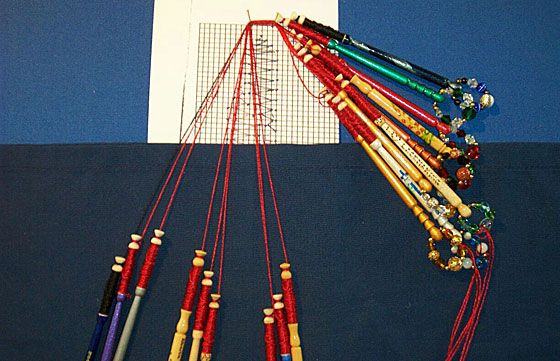
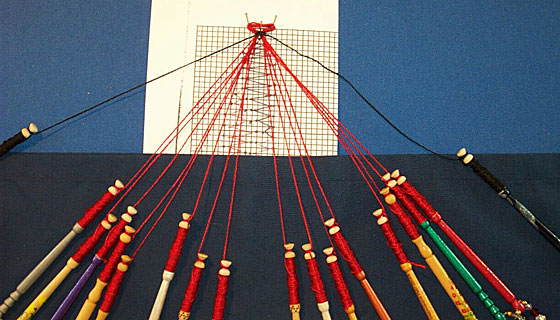
Push the bobbins to either side with four pair of red on the left, and four pair on the right. You will begin weaving the peak using the middle pair (silver and blue bobbins) and one pair from the four pairs to the right hand side.
Begin by making the cross-twist-cross of Cloth Stitch, then add an extra twist onto the workers (the blue and silver bobbins) to finish off the row.
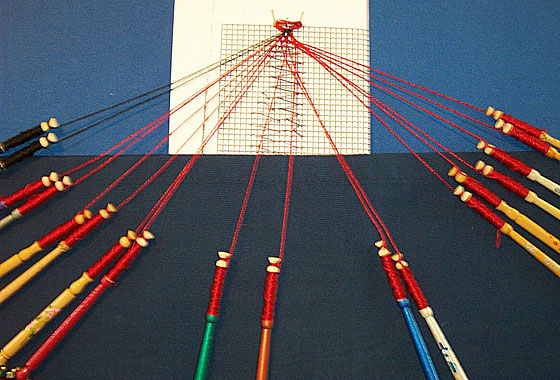
Set a pin at the dot at the top point of the pricking and make another Cloth Stitch. Note the blue and silver bobbins have moved from the right hand side of the green and copper to the left hand side.
Push the green and copper pair to the right, and bring in the pair to the left making a Cloth Stitch, setting the pin, and closing it by making another Cloth Stitch. The workers will now move to the right and left, adding in pairs to increase the weaving and form the point of the bracelet.

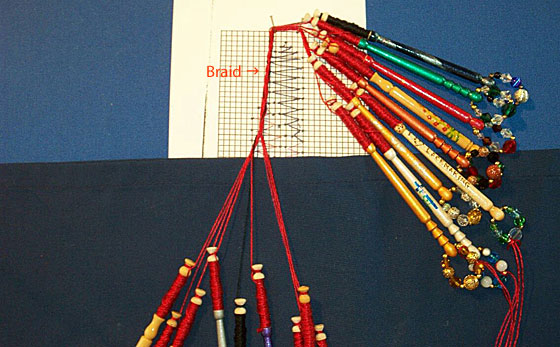
Continue making the bracelet as shown in the pricking, weaving across the passives with the workers in Cloth Stitch.
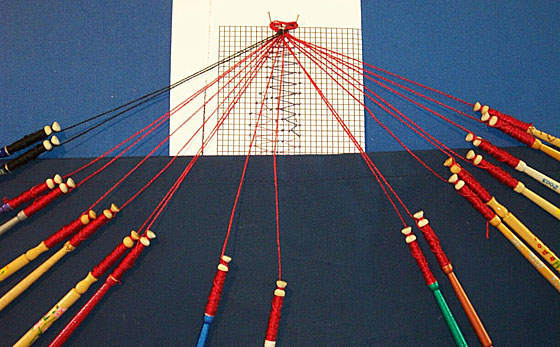
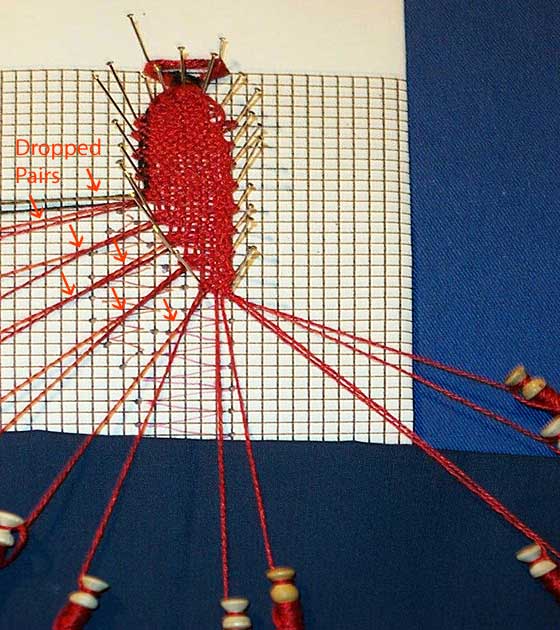
The first section (in blue) is woven using the workers as established above. As you work down the shape, you will narrow it by dropping successive pairs of passive threads off to the left and leaving them unwoven. For example, to start shortening the rows, leave the black pair and one red pair off to the left and unwoven. When the pricking calls for the row to shorten further, leave an additional red pair unwoven on the left (three pairs/six threads unwoven total), and so on.
Add a twist to all of the passive pairs before beginning the next section. This adds stability at the pin and prevents the threads from separating.
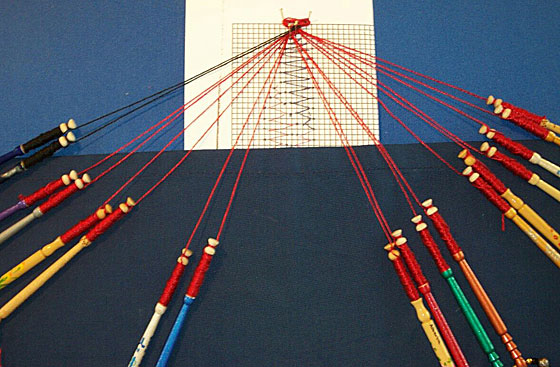
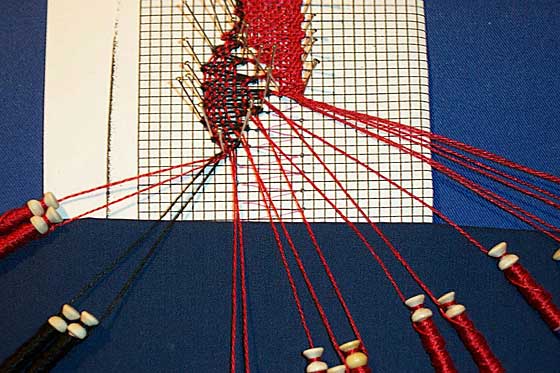
After the first section is woven, you will weave the second section (in red.) Switch to the black pair (on the far left) to use as the workers to weave the central fan motif. As you work across, you will pick up the dropped pairs that were left unwoven in the previous section. In this manner you will pick up more and more pairs of passive threads as the shape increases. When the fan begins to decrease, you will again drop pairs (in short-row style) as you bring the shape down to a point.
Add a twist to all of the passive pairs before beginning the next section.
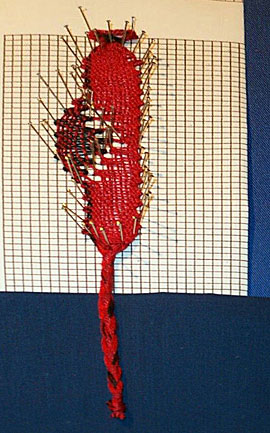 The third section (in green in the pricking) is woven using the same worker pair as in the first section (on the right.) As before, you will begin increasing by picking up the dropped pairs (more and more on subsequent rows) and then decrease back down to a point by dropping pairs short-row style. Run the dropped pairs along the sides of the third shape until you are done weaving. These will be incorporated into the band later.
The bracelet is finished. The pins can now be carefully removed and the project removed from the pillow.
Finishing
The dangling threads at the end of the weaving can be finished off in a number of different ways—braided, plied together, etc. Regardless of your method, these threads should be gathered together into a long tail which can be threaded through the loop at the top of the weaving to make a friendship bracelet.
You can tie the bracelet closed, or attach a button or bead to the tail to act as a closure.
The cloth stitch is a basic lace stitch that creates a simple over-one, under-one pattern. It creates an area of plain weave in the lace. It consists of three basic steps: cross—twist—cross.
The cloth stitch can be worked going right or left. In the example below, I am starting on the right and working left.
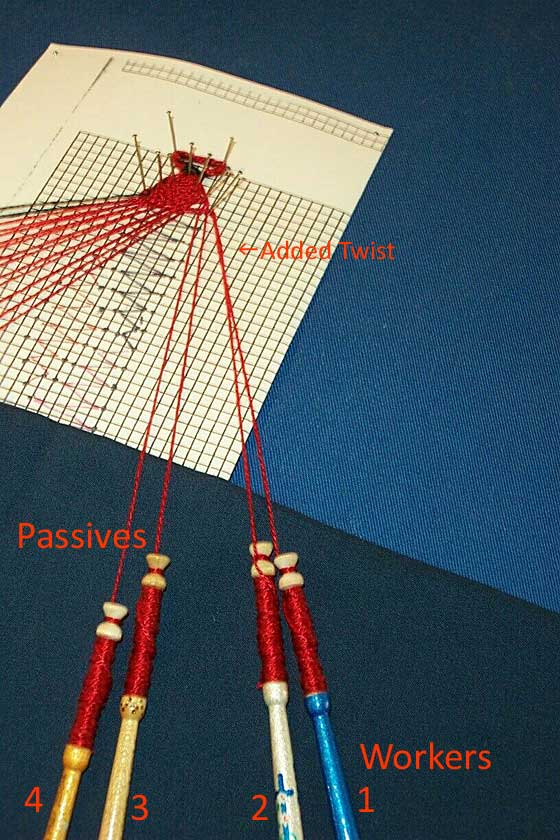
I begin weaving with the four bobbins at the far right side. The bobbins that will be used to make the stitch are labeled from right to left: 1, 2 ,3 ,4. Bobbins 1 and 2 are the worker threads, while 3 and 4 are the passives.
Notice that the threads on the bobbins 3 and 4 run parallel from the bobbins to the weaving while the threads from 1 and 2 are twisted. At the end of each row of weaving, you will add a twist (right over left) to the worker threads when you set the pin, as shown in the picture below.
Step 1: Cross
The name of the first of three movements to make Cloth stitch is called a ‘cross’. The first movement in making Cloth Stitch or plain weave is to take bobbin 3 and move it to the right over bobbin 2.
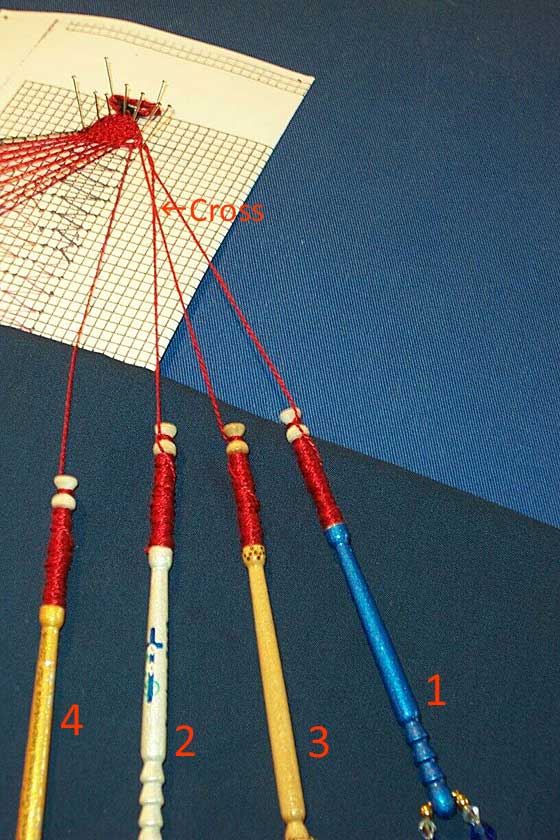
The order of the bobbins is now 4, 2 , 3, 1.
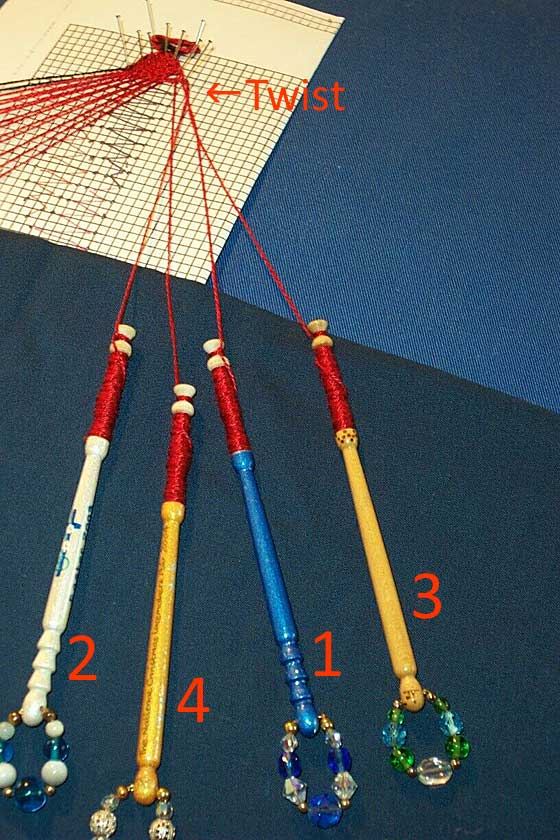
Step 2: Twist
The second movement in the making of Cloth stitch is called a ‘twist’. Take bobbins 1 and 2 and move them to the left over bobbins 3 and 4.
The bobbins are now in the following order: 2, 4, 1, 3.
Step 3: Cross
The last movement in the making of Cloth Stitch is to do another ‘cross’ by moving the bobbin 4 to the right, over the bobbin 1.
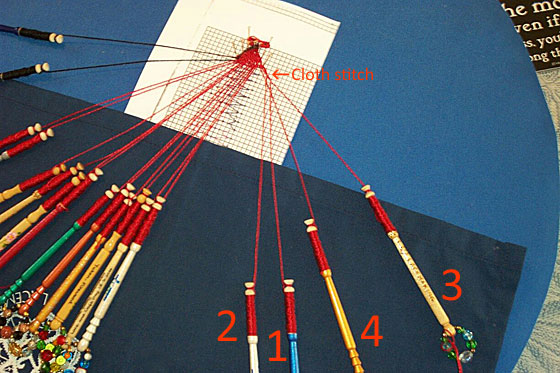
The bobbins have now changed their order to 2, 1, 4, 3.
The Cloth Stitch using these four bobbins in now complete. The worker pair (bobbins 1 and 2) have woven through the passive pair (bobbins 3 and 4).
The worker pair will continue moving to the left making a Cloth Stitch (cross, twist, cross) with the next passive pair on the left until all the bobbins in the row have been worked. At the end of the row, add an extra twist to the workers when you set the pin into the next dot on the pricking. After the pin is set, apply tension to the row of weaving to firm up the cloth.
The workers are now ready to make exactly the same movements to traverse back across the passives—this time moving from left to right—to weave the next row.
Resources
For additional information about weaving bobbin lace, see the following resources:
- Lessons in Bobbin Lacemaking by Doris Southard
- Drafting Torchon Lace Patterns by Alexandra Stillwell
- Practical Skills in Bobbin Lace by Bridget M. Cook
- The Book of Bobbin Lace Stitches by Bridget M. Cook and Geraldine Stott
- Larkholme Lace website
 Laura Fry has been weaving professionally for more than thirty years. In 1997, she was granted her Master Level by the Guild of Canadian Weavers. In 2004, she self-published a book, Magic in the Water: Wet Finishing Textiles. Her website is full of articles and tips about weaving. She sells woven items and weaving supplies in her ArtFire store.